

You've got boxes along the hallway, the kitchen still looks untouched, and every cupboard you open adds another job to the list. Meanwhile, you still need to cook, get dressed, and find your laptop charger. Packing gets frustrating when you seal things you still need while leaving difficult decisions until moving day.
Learning how to pack efficiently for a move starts with changing the order of the work. Remove what shouldn't travel, choose containers for the actual load, and pack in the order you'll stop using things. The aim isn't to fill boxes quickly. It's to avoid opening, carrying, or sorting the same belongings twice.
Table of Contents
- Packing Timeline from Six Weeks Out to Moving Day
- What to Remove Before You Pack a Single Box
- Boxes and Supplies Sized to What You Are Packing
- Room by Room Packing That Protects Every Box
- Labels and an Essentials Box for Moving Day
- Book Packing Help for the Rooms You Cannot Finish
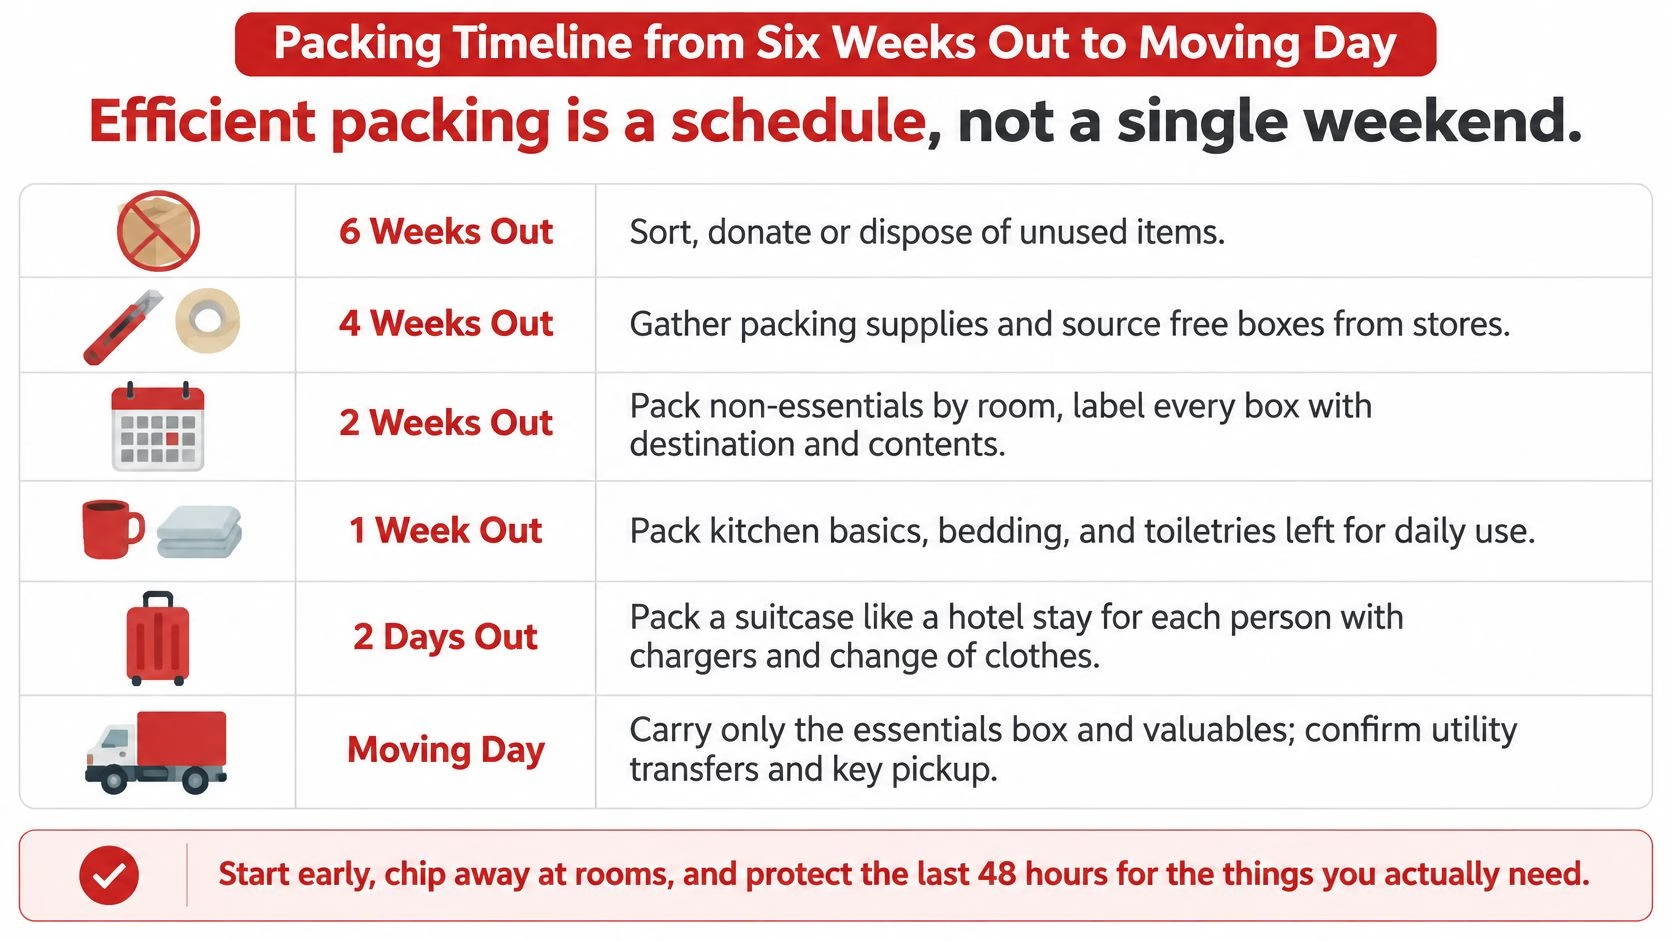
Packing Timeline from Six Weeks Out to Moving Day
Efficient packing is a schedule, not a single weekend. Use this working timeline to assign tasks, then adjust the start date to suit your household.
| Timing | What to pack or do | Why it saves time |
|---|---|---|
| 6 weeks out | Sort, donate or dispose of unused items; measure large furniture | Less volume means fewer boxes and less lifting |
| 4 weeks out | Order boxes, tape, markers and padding; book packing help | Supplies arrive before you need them |
| 3 weeks out | Pack seasonal clothing, decor and rarely used rooms | Out-of-season belongings are out of the way first |
| 2 weeks out | Pack books, spare cookware, linens and the guest room | Dense, low-use items are sealed early |
| 1 week out | Pack most of the kitchen and bedrooms, keeping daily-use items out | Daily life is disrupted only at the end |
| Day before the move | Pack the essentials box, empty appliances, set aside items for your own car | Arrival and the first night are covered |
Make each stage finishable
During the sorting stage, measure furniture against the destination's rooms, doorways, and access route. For a Boston apartment, that includes stair turns and landings, not just the front door. A sofa that fits the living room but can't reach it still creates a moving-day problem.
Before supplies arrive, create a clear packing station with scissors, a tape dispenser, markers, and wrapping paper. Keep finished cartons away from exits and the route movers will use. Use our moving timeline to coordinate packing with the rest of your relocation arrangements.
Check rooms, not hours worked
Start with a guest closet or seasonal decorations rather than dismantling your everyday kitchen. Finished means the selected belongings are packed, sealed, and labeled, with donation bags already removed.
Progress check: By the final week, aim to have every room packed except for a deliberately chosen daily-use kit.
For a larger home, move the stages earlier rather than squeezing more work into the last weekend. Leave the final days for the things you're still using, not forgotten cupboards.
What to Remove Before You Pack a Single Box
Packing more into fewer boxes isn't automatically efficient. If you transport duplicate utensils, broken appliances, and furniture you won't use, you've packed unnecessary work more tightly.
Set up a four-way sort before opening a carton:
- Keep: Belongings with a clear use and a place at the destination.
- Donate or sell: Usable items you no longer need, with a removal deadline.
- Recycle: Materials accepted by your local recycling program.
- Discard: Unusable items that can't safely be donated or recycled.
Take a kitchen drawer full of duplicate spatulas, worn gadgets, and expired spices. Keep the tools you use, donate suitable clean duplicates, and discard spoiled contents appropriately. That decision can eliminate a carton before you spend time wrapping anything.
Separate hazardous products from household goods
Paint, fuel, propane cylinders, pesticides, cleaning chemicals, aerosols, lithium batteries, and pool chemicals need a separate decision. Don't hide them inside ordinary cartons or assume they can travel in your car instead.
The U.S. Department of Transportation's hazardous-materials guidance identifies risks involving flammable liquids, corrosives, toxic products, gases, and batteries, including the need to protect batteries against short circuits. Carrier approval and appropriate handling come before packing.
Keep hazardous products sealed in their original labeled containers, upright, and inside compatible secondary containment to catch leaks. Never combine leftovers to save space. Isolate battery terminals with nonconductive protection and keep loose batteries away from keys, tools, and other conductive materials.
Use a practical decision path: retain a needed product pending the carrier's approval, donate an unopened product only where it's accepted, or arrange disposal through a local household hazardous-waste program. Confirm what the program accepts before arriving.
A shelf of half-used paint and a fuel can is a disposal-planning task, not a box-packing task.
Schedule donation pickup and disposal before your packing area fills up. A pile marked for removal still blocks the hallway until someone takes it away. Removing unneeded and unsuitable materials reduces handling, last-minute refusals, and spill risk more effectively than a clever folding technique.
Boxes and Supplies Sized to What You Are Packing
| Item type | Box choice | Load guidance | Handling note |
|---|---|---|---|
| Books, canned goods, tools | Small, reinforced | Use rigid construction for dense loads | Stop before the carton becomes difficult to lift |
| Clothing and linens | Medium or large | Keep the load light | Fill evenly without bulging the sides |
| Dishes and glassware | Small or medium, individually wrapped | Allow for cushioning rather than maximum capacity | Fill voids without compressing fragile pieces |
| Electronics | Original box with fitted inserts, if available | Follow the packaging's rated capacity | Cushion all sides and maintain the intended orientation |
| Artwork and mirrors | Specialty box or custom crate | Match support to dimensions, weight, and fragility | Plan crating for large or valuable pieces |
| Lamps and hollow items | Medium or purpose-sized | Separate heavy bases from delicate components | Support suitable hollow spaces before wrapping |
Box volume isn't load capacity. A large carton of bedding can be manageable; the same carton filled with books can be difficult to carry and vulnerable at the bottom seam. Choose the container after identifying its contents, not the other way around.
For comparing dimensions before ordering, Material Handling USA's corrugated box size chart is a useful reference. Standardize your carton footprints so stacks align rather than balancing mismatched boxes.
Compare supplies by the whole move
New cardboard gives you consistent dimensions and predictable condition, but you'll need an unpacking and recycling plan. Borrowed cartons reduce purchases, provided they're clean, dry, strong, and free of contamination. Retire crushed, damp, or weakened boxes, especially for dishes, electronics, books, and artwork.
Reusable plastic totes can suit a short office relocation where uniform containers simplify handling. Check lid fit and stacking stability, and keep them protected from rain. Their usefulness depends partly on whether you can empty and return them within the agreed collection window.
Professional packing materials make sense when an object needs fitted protection rather than improvised padding. A specialty mirror carton or correctly sized insert solves a different problem from a general-purpose storage bin.
There's no reliable container count based on bedroom count alone. A studio with extensive books and kitchenware may need more small cartons than expected, while a larger home may contain mostly furniture. Estimate from the sorted contents of each room, then hold a modest supply of spare cartons.
Plan what happens after delivery
The EPA reports that containers and packaging generated 82.2 million tons of municipal solid waste in 2018, with a 53.9% recycling rate. Reuse sound materials, separate recyclable cardboard from trash, and establish who will collect rented containers before choosing them.
In a 2025 Canadian Association of Movers survey, 50% of responding companies reported recycling or reusing moving supplies. Don't assume collection is included in your own arrangement. Confirm return dates and accepted materials before buying or borrowing, and use our guide to packing a box for moving when assembling your packing station.
Room by Room Packing That Protects Every Box
Work through storage areas, the garage, and the guest room first, followed by dining and living areas. Leave active bedrooms and the everyday kitchen until later. Within each room, finish a defined shelf, cabinet, or drawer rather than spreading loose belongings across the floor.
The repeatable packing method below keeps the job consistent even when different people are helping.

Start with density, then build protection
Pack books, canned goods, tools, and compact appliances into small reinforced cartons. As a conservative packaging benchmark, USPS standards describe sturdy paperboard or corrugated boxes for loads up to 10 pounds, while dense items weighing 20–45 pounds need stronger fiberboard or equivalent rigid containers. These are postal packaging benchmarks, not targets for every moving carton or guarantees that a load is safe for you to lift.
Use larger cartons for clothing and linens. Pack empty cookware separately from glassware, and protect coatings and handles rather than dropping loose pans around delicate items.
For breakables, use the same protection sequence:
- Prepare the outer carton. Reinforce the bottom and leave room for cushioning around the contents.
- Wrap pieces individually. Protect rims, handles, corners, and other vulnerable projections.
- Separate contact points. Add partitions or corrugated dividers so wrapped objects can't strike each other.
- Support the load. Place heavier pieces at the bottom and fill suitable hollow spaces.
- Fill remaining voids. Use crumpled packing paper or suitable cushioning without forcing the carton outward.
A fragile label won't compensate for objects touching inside a box. Nor will a towel casually draped over a collection of glassware provide reliable separation.
Apply the method to each room
In storage and garage areas, group tools so sharp edges can't puncture the carton. Cover blades and secure loose parts. Keep the work area clear enough that you can carry finished boxes without stepping over unpacked equipment.
In dining and living rooms, pack dishes, ornaments, and framed pieces before moving bulky furniture around them. Wrap plates separately and place them upright with cushioning between them. Pack lampshades apart from heavy bases, and don't use the shade carton as spare space for unrelated objects.
In bedrooms, separate hanging clothes, folded clothes, and bedding so they arrive in usable groups. Clothing can generally remain in dresser drawers during the move, but remove anything breakable or likely to roll around. Don't turn drawers into containers for loose electronics, jewelry, or desk supplies.
In the kitchen, finish spare serving pieces and occasional appliances before daily cookware. Wash and dry items before packing so you don't seal moisture inside. Empty dishwashers, microwaves, refrigerators, washing machines, and dryers before the move, including forgotten utensils, food, laundry, and removable contents.
For renters, coordinate the packing sequence with cleaning. Gmaids' apartment move-out checklist can help you plan the cleaning tasks involved when trying to get your security deposit back, without reopening packed cupboards or blocking cleaned floors.
Test before sealing
Close the flaps temporarily and gently move the carton. If you hear movement, feel the load shift, or notice contents pressing against the walls, reopen it and adjust the cushioning. This movement test is more useful than judging protection by how much wrapping paper you've used.
The archived USPS packaging standards describe blocking and bracing capable of preserving package integrity after a drop onto a smallest side from 3 feet. Treat that as a reason to build structural protection, not an instruction to drop-test your belongings at home.
Seal the center seam and edge seams with pressure-sensitive packing tape or suitable filament tape. Don't rely on masking tape, loosely folded flaps, or extra tape to repair a carton whose walls have already failed.
Finished-box standard: Full without bulging, level on top, structurally sound, and manageable for the person carrying it.
Keep dense cartons low during loading and near the vehicle's centerline rather than above delicate boxes. Artwork, antiques, mirrors, and unusually shaped electronics may need custom blocking or crating instead of more loose padding. If a wrapped glass still rattles inside its carton tonight, correct the method before packing the rest of the cabinet.
Labels and an Essentials Box for Moving Day
Labels are for retrieval at the destination, not just for getting cartons onto the truck. Write them as though someone who has never seen your new home will be delivering the box.
Use this checklist on each carton:
- Destination room: Name the room at the new property, not where the item used to live.
- Contents: Be specific, such as everyday mugs and tea supplies.
- Opening priority: Use a simple number key for immediate, soon, or later.
- Orientation: Add an upright arrow where handling direction matters.
- Approximate weight: Flag dense loads before someone tries to lift them.

Build a first-night kit
Keep medications, important documents, valuables, toiletries, clothing, phone and laptop chargers, and a power strip with you. Add toilet paper, trash bags, basic tools, and enough kitchen equipment to make a simple meal or coffee. Protect a kitchen knife in a rigid sheath, not loose among essentials.
Use a manageable bag or carton, splitting out documents and medications so they stay accessible. Don't let this kit disappear into the loading pile.
Give helpers a room key
Assign room colors and repeat them on a simple destination floor plan. InchBug's approach to storage bin labels for classrooms offers a useful organizational idea: consistent visual categories make containers easier to recognize.
Use our box-labeling guide for movers to prepare your markings. Before the crew arrives, walk through and check every carton, then photograph a single-sheet key showing room names, colors, and opening priorities. Anyone helping should be able to place a box without asking you.
Book Packing Help for the Rooms You Cannot Finish
Pack yourself when the schedule is comfortable and the fragile load is manageable; book help when time, scale, or specialized protection makes that unrealistic. A local move can still involve a demanding kitchen or delicate collection, so distance alone shouldn't decide it.
Partial packing is the middle option: you handle straightforward rooms while the crew handles the unfinished areas or fragile belongings. We offer full packing, partial packing, and unpacking, along with a free packing and storage estimate with no obligation. Our recommendation is to book packing services 2–4 weeks ahead.
Prepare for the estimate
Bring a concise list to the call:
- Schedule and scope: Move date, destination, and rooms still needing packing.
- Fragile inventory: Types and quantities of glassware, artwork, antiques, and electronics.
- Special decisions: Hazardous products awaiting transport guidance and any unpacking needed at arrival.
Mark your packing timeline with the rooms you'll handle and those you'll hand off. Contact TLC Moving & Storage before that booking window narrows, rather than hoping the most difficult room will fit into the last evening.
TLC Moving & Storage offers professional packing, unpacking, and storage, including help with selected rooms and fragile belongings. Visit TLC Moving & Storage to request a free, no-obligation packing and storage estimate and decide what to pack yourself before moving day.
Recent Comments